Quilt Labels
How to Make a Quilt Label Using Canva and Heat Transfer Paper
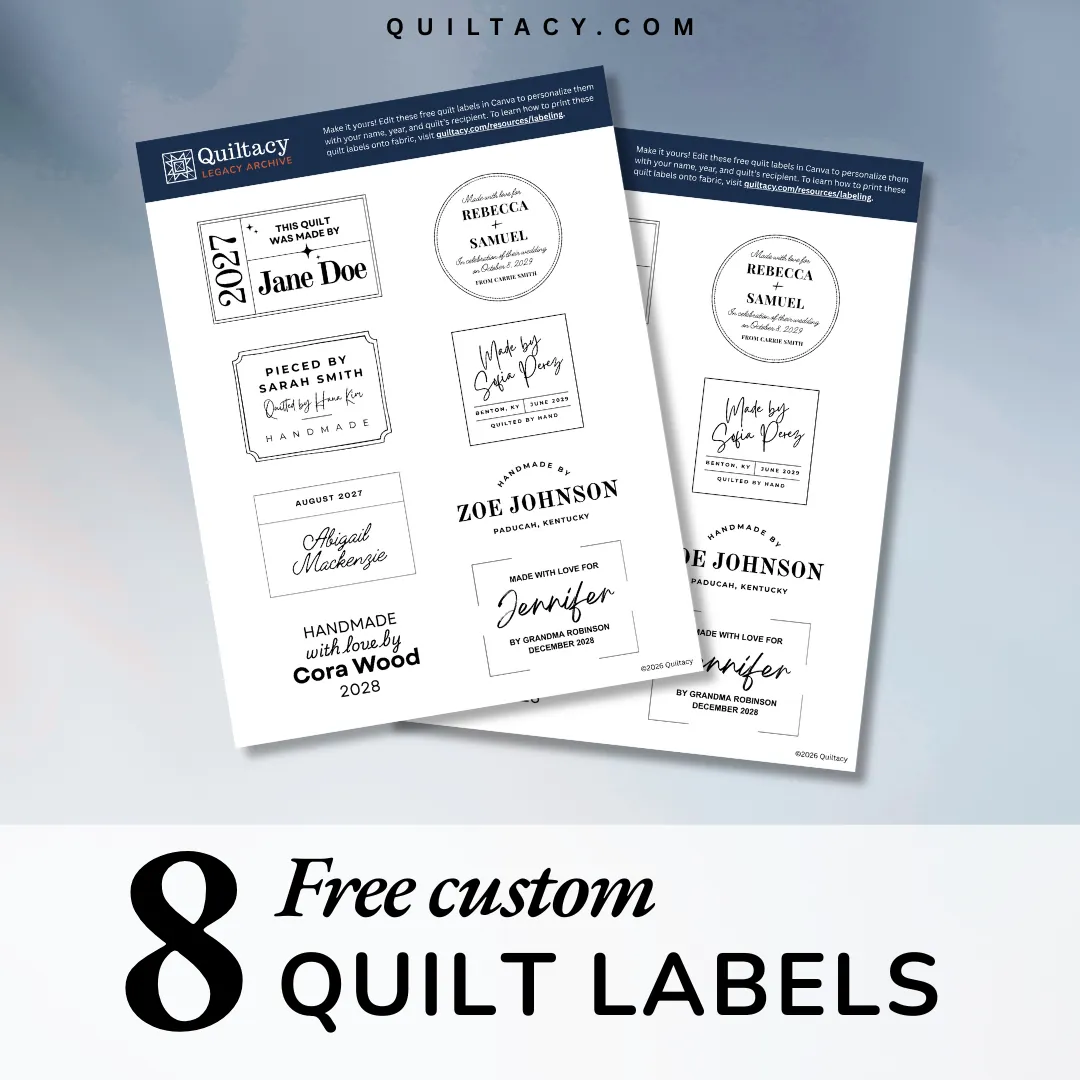
Your quilt is quilted, bound, and beautiful… last step, a label! Use our free template in Canva to create a custom label, then print it on heat transfer paper. This guide walks you through every step, including the full Canva workflow.
Why should I put a label on my quilt?
A quilt isn't finished until it has a permanent label sewn on it. Several decades from now, no one will know who made it, when, or for whom. A label sewn to the backing of your quilt changes that. It's the most durable record a quilt can have, because it travels with the quilt itself.
For a deeper look at label methods and placement, see How to Permanently Label a Quilt.
What to Put on a Quilt Label
The basics are the same for nearly every label: your full name (not just "Grandma") and the year you finished it. These are the basics you should put on each quilt you complete.
For a more complete custom quilt label, consider adding:
- The name of the person who quilted it (especially if the quilting is custom)
- The recipient's name and occasion, if it's a gift
- Your city or location (optional, but future generations will appreciate it)
- The quilt's title or name
- Care instructions
- Pattern name
If your label size is limited, keep the words to what fits comfortably. A label that's legible is more useful than one that's crowded.
What Size Should a Quilt Label Be?
Three by four inches is the standard. It's large enough to hold your name and details in a readable font, and small enough to sit neatly in the corner of any backing fabric. In the end, the size and shape of your label can be as custom as the quilt itself.
What You Need to Make a Quilt Label at Home
Digital
Physical
- Inkjet printable heat transfer sheets (options include Avery's “Printable Fabric Sheets” or Cricut's “Printable Iron-On for Dark Fabrics.” Both are available online and at some craft stores)
- An inkjet printer (not a home laserjet printer)
- Scissors or a rotary cutter
- A dry iron
- A piece of scrap fabric to protect your iron
- A quilt with a 100% cotton backing (a minky or Shannon Cuddle backing will melt)
How to Make a Quilt Label in Canva: Step by Step
Most articles mention Canva in passing and move on. This section assumes you're sitting at your computer, ready to go.
Get the free quilt label template
Pop in your email and we'll unlock the template right away. You'll also join our list for the occasional quilting tip. Unsubscribe anytime.
We'll only email you quilting tips and Quiltacy updates. See our Privacy Policy.
Step 1: Create a free Canva account
Go to canva.com. Click "Sign up." Enter your email or continue with Google. The free tier is everything you need here. No paid plan required.
Step 2: Open the Quiltacy quilt label template
Once you've created your free Canva account and are logged in, click the link to Quiltacy's free Quilt Label Template. Canva opens the template automatically. You'll see several label designs on the canvas, each one ready to customize.
Step 3: Customize your text
The elements in each label are grouped so they stay aligned when you move them. That's helpful until you want to edit individual pieces.
Click the label once to select the group. A small toolbar will pop up near your mouse. In this toolbar, click "Ungroup." Now, each text box and shape in the design is independent. Double-click any text box to edit it. Type your name, date, or any other detail you want to include.
To change the font size: highlight the desired text and use the size box in the top toolbar. To change the font: highlight the text, click the font name in the toolbar, then type a name or scroll the list. To change the size of an element: click once on the element. You'll see a blue border appear around it. Click and drag one of the white circles in the corners to change the size of that item.
When you're done editing, select all the elements of that label by clicking and dragging a box around them. Once all of the elements for that label are selected, click "Group" to lock them back together. This keeps everything tidy if you want to duplicate the label, resize the entire label, or move the labels around the page.
Step 4: Download your file
Click "Share" in the top-right corner of Canva, then "Download." Choose PDF > Print. This keeps your label at the correct physical size when you print. Select "Download." The file saves to your Downloads folder, ready to print.
How to Print Your Quilt Label on Inkjet Printable Fabric
You've got the file. Here's how to print it on fabric.
- Load one heat transfer sheet into your printer's manual feed tray. The fabric side should face the direction your printer prints on. If you're not sure, mark a scrap sheet with a pencil X and run a test print through your printer first.
- Open your PDF file and go to Print.
- Set the scale to "Actual size," not "Fit to page." PDF viewers default to Fit, which will resize your label.
- Print at your highest quality setting, then set the sheet aside to dry flat for at least 15 minutes.
- Cut out your label, trimming about a quarter inch under the border.
- Peel away the paper backing.
- Place your label in your desired location on the quilt. Most labels are located on the bottom right corner of the quilt (when viewed from the front).
- Read the instructions for your specific package of heat transfer paper for iron temperature and time. Iron your label onto your quilt, using a piece of scrap fabric to protect your iron. This step is permanent, so be careful about your placement.
Get the Free Quiltacy Quilt Label Template
Download the free template from Quiltacy, customize it in Canva, and keep a copy for every quilt you finish.
Get the free quilt label template
Pop in your email and we'll unlock the template right away. You'll also join our list for the occasional quilting tip. Unsubscribe anytime.
We'll only email you quilting tips and Quiltacy updates. See our Privacy Policy.
Frequently Asked Questions
What size should a quilt label be?
Three by four inches is the standard size for a quilt label. It's large enough to hold a name, date, and a few details in a legible font, and small enough to sit in the corner of a backing without being intrusive. For labels with more text or a photo, four by five inches is a reasonable upper limit.
Do I need a paid Canva account to make a printable quilt label?
No. The free Canva account is all you need. The Quiltacy quilt label template is compatible with Canva's free tier. You can customize text, change fonts, and download a print-ready PDF without upgrading.
What kind of printer do I need for printable fabric sheets?
You need an inkjet printer. Laserjet printers run at temperatures that can melt the heat transfer paper and potentially jam the machine. Most home printers are inkjet; check your printer's documentation if you're not sure.
How do I make my quilt label permanent so it doesn't wash out?
Heat-setting is the key step. After printing, follow the ironing instructions from your heat transfer paper's package. Labels set this way hold up through regular washing.
Can I add a photo to my quilt label in Canva?
Yes. In Canva, click "Uploads" in the left sidebar, then upload a photo from your computer. Drag it onto the canvas and position it within your label design. Resize it by dragging the corner handles. A small photo of the quilt top printed on the label is a nice touch for gift quilts.
How do I attach the label to the quilt?
Cut out your label, trimming about a quarter inch under the border. Peel away the paper backing. Place your label in your desired location on the quilt. Then follow the instructions for your specific package of heat transfer paper for iron temperature and time. Iron your label onto your quilt, using a piece of scrap fabric to protect your iron.